Sunday, 27 December 2009

Cards made for Secret Santa 2009

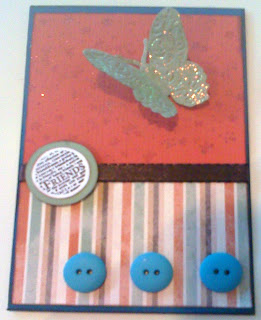
The team that I'm in at work decided to do a Secret Santa. The gift was to cost no more than $10. You could either purchase a gift for $10 or make something using materials to the value of $10. As I love craft, I decided that I would make some cards, using materials up to the value of $10. To assist me with this, I found a OSW inspired by Sandra Wingate of Paper, Pansies and Pachyderms blog. I also decided, because I left it so late, that I would only make cards up until midnight. I was starting at 9pm, and I figured midnight was late enough since I had to work the next day and I wasn't feeling very well.  Anyway, I managed to make six cards.  Below are the cards I made, which I'm really happy with and the person who received my Secret Santa was also very happy.


Card 01


Card 02


Card 03


Card 04


Card 05


Card 06

I used Stampin' Up cardstock and the retired DSP Outlaw as well as Stampin' Up stamp sets, Hero Arts stamp sets, buttons, my new Martha Stewart Vine Punch, ribbon, my nestabilities as well as a new Cuttlebug butterfly embossing & die cut.
Cheers FiLoMa


Saturday, 5 December 2009

Anniversary Card

A friend of mine asked me to make him an anniversary card. I had a lot of flexibility, he said, make it girlie and pink, which are two of my most favourite themes. I find as I get older I am more partial to the colour pink, within reason.  The card I made was the flip flop album, inspired by Annette Rolls. I am very happy with the outcome and so is my friend. I can't wait for him to give it to his wife and here how she feels about it.


Front view closed


Front view inside


Open view


Flap one


Flap two


Flap three


Back flap
Cheers FiLoMa

Craft Room Updated

As I am an organisation freak, I'm always looking for better ways to improve on my craft room. Recently I purchased some small bookcases for my craft room and I am very happy with how they have really helped my craft room come together to look and feel better organised. I am finding that I can easily find items and access them better.  Below are updated photos of my craft room, which have also been added to my slider.

View 01

View 02


View 03

View 04

View 05
Cheers FiLoMa

2009 Calendar Swap

This year I participated in three calendar swaps. The themes were Pink, Black and White and No Theme. Below are the calendars I did.


Theme: Pink
Orientation: Landscape


Theme: Black and White
Orientation: Portrait


Theme: Black and White
Orientation: Portrait

 
Theme: No Theme
Orientation: Portrait

 
Theme: No Theme
Orientation: Portrait

Cheers FiLoMa

Monday, 19 October 2009

Second blog created dedicated to my Lifestyle changes

To those people who may read my blog for my Lifestyle updates, I have decided to create a second blog, which is dedicated to my Lifestyle changes.

My FiLoMa's World blog has been renamed to FiLoMa's Craft World and will now be dedicate solely to my love of craft.

My lifestyle blog is titled "FiLoMa's Lifestyle World". I will be moving my old Lifestyle Update posts to this new blog, once I figure it out besides cutting/pasting LOL.
Cheers FiLoMa

Wednesday, 7 October 2009

Creating a Transparent watermark signature using Paint.Net

Ok, I'm not really sure who will read this, but I just had to share that I was so excited when I found some great help on-line, after a few days of searching, on how to create a transparent watermark signature in Paint.net. I was at the stage of pulling my hair out, ready to give up and go buy some software. However, during my late night/early morning search I found some really easy instructions. Unfortunately I didn't note who the author was of the instructions, as I wasn't originally going to post to my blog how to. However, there maybe someone else out there googling this question, so I decided I would post the instructions I found so that it can assist anyone else who may have been in the same position I was.

"Creating a transparent watermark signature using Paint.Net"
  • Open Paint.Net
  • Click on the New icon or File New - this will open up a default Background
  • Ensure you open up the Layer Window - From the Tool Bar select Window->Layers
  • Add New Layer by clicking on the far left icon of the Layer window, the one with the plus sign
  • In the Layer Window, select the Background, then click on the delete button. You will now be left with a transparent layer, reflected by the black and white check background
  • Click on the Text key in the Tool bar. Type your text.
  • Save as .png - this is very important. I tried to save as .jpg, but it didnt' give me the transparent background I was after. Therefore, it must be .png if you want the transparent background.
And that is it. You can then import this file over any other image,. An example of this is my previous post, where I imported this watermark over the top of a scan of my card.

The reason I wanted to create this watermark signature template, was so I could import over my scanned images of my cards that use Stampin' Up products. As I am an Independent Stampin' Up demonstrator, it is a requirement to ensure that the Stampin' Up ® images are copyright protected.

If this does help anyone, I would be pleased to know about it.
Cheers FiLoMa

Inkspirations Inspiration Challenge #13

I have decided to have a go at the Inkspirations Inspiration Challenge #13 as posted on Makeesha Byl's web.  The inspiration was:


As this was my first time I was very nervous. I decided to try a new card technique, the Tri-Shutter card. I am happy with what I created and I think I managed to meet the challenge requirements.  The photos aren't the best, but the first one is of the Tri-Shutter card closed and the second one is with it open:

Tri-Shutter Card front

Tri-Shutter Card open

Card Recipe:
Stamp Set - Always; Baroque Motifs; Illuminations
Cardstock - Sahara Sand; Chocolate Chip; Whisper White; Red Riding Hood
Ink - Real Red; Versa Mark
Accessories - Red Riding Hood Ribbon; Embossing powder mixed with Dazzling Diamonds; Nestabilities Classic & Scallop Oval; Border Punch

Cheers FiLoMa

Saturday, 26 September 2009

Belated Birthday Card - Lana

This is the belated birthday card I made for my friend Lana. I purchased some Glitter Sheets so I thought I'd make her card with this nice sparkly paper. I'm really happy with how the card turned out. I also like that it is a simple card, especially since I only had about 30 minutes to make it.  The scan of this card isn't the best, as the Glitter sheet is green, which is hard to see properly.


Cheers FiLoMa

Monday, 14 September 2009

SU Workshop Cards #01

Yesterday, Sunday 13 Sep 09, I attended a SU workshop, which I haven't done in months. I had a great time and thoroughly enjoyed making these cards. I absolutely love the "Trendy Trees" stamp set, which is high on my wish list.

Cheers FiLoMa

Monday, 10 August 2009

Wedding Invitation - Dummy Card for Kate

The following card was made for my friend Kate who is getting married. This card was CASED from Jayne Mercer, as published in Australian Stamping and Papercraft Magazine Vol 14 Nr 12. Kate liked this card for her wedding invitations, so I have done up a dummy one for her to show her what the card will look at. I have modified it slightly in size and adding additional embellishments, however it pretty much looks the same as the publish one, just a different colour.


Cheers FiLoMa

Sunday, 5 July 2009

Craft - Update #02

Today was a fun filled day of crafting with my girlfriend. She came to work on her calendar page for a swap she is in and I am slowly but surely progressing my mum's scrapbook album. I have committed to having it done by September 2009, at the absolute latest. I'd say I'm about half way through.

I have done a little bit of card making this weekend while I also reorganised my craft room. The following card was CASED from Lana Murray of Keep It Simply Stamping (K.I.S.S). I liked her card so much I brought the paper pack and made my own card.


There were six sheets of this 6"x6" patterned paper. Since this card turned out so great, I plan to use all six sheets to make more of this type of card, just changing the sentiment on each of them. I like that the card is very simple but also very effective. The colours come to gether really well.
Cheers FiLoMa

Sunday, 28 June 2009

Cup Cake Mania Card - WIP Card Class

I attended another card class at Wrapped In Paper. This class was called "Cup Cake Mania". I really enjoyed making this card and I learnt a new technique, which is always a good thing. I can see myself making several of these cards.

Full View


Panel 01


Panel 02


Panel 03


Panel 04


Panel 05
Cheers FiLoMa

Friday, 26 June 2009

Birthday Card - Nicole

As I've posted before, I had a lot of fun making the never ending flip card at Wrapped In Paper. As such, I made another one for my friend Nicole, who loves the colour green. I'm really happy with how this never ending flip card turned out and I know Nicole was very happy with it.


Front


Flip 01


Flip 02


Flip 03
Cheers FiLoMa

Sunday, 7 June 2009

Engagement Card - Kate & Dan

My work colleague & friend, Kate, got engaged to her partner Dan on Friday. This is the card I wiped up on behalf of the team, congratulating them on their engagement.


Cheers FiLoMa

Birthday Card - Elle

I liked the WIP never ending flip card so much that I made one for my friend Elle's birthday. I have used shades of blue. I am very happy with the card.


Front


Flip 01


Flip 02


Flip 03
Cheers FiLoMa

Sunday, 24 May 2009

Never Ending Flip Card - WIP Card Class

I made the following Never Ending Flip Card at a card class run by Wrapped in Paper. I had a great deal of fun doing it and now I'm just cupcake mad.

Front Cover


Flip 01


Flip 02

Flip 03

Cheers FiLoMa

Sunday, 10 May 2009

Mother's Day Card

Last night I made the following card for Mother's Day:


My mum really liked the card. The technique for this card came from a tutorial on You Tube called Spellbinders Nestabilities Origami Flower and it is presented in two parts, which can be located at Part One and Part Two.

I found making this card very simple and quite quick. I actually made three cards in total and let my mum pick the one she liked the best. The other two cards have been uploaded to my picasa web album, FiLoMa's Craft 2009.

Making these Origami flower cards reminded me how much I love my card making. It has been ages since I made any cards, and this is just the start of getting me back into it.
Cheers FiLoMa